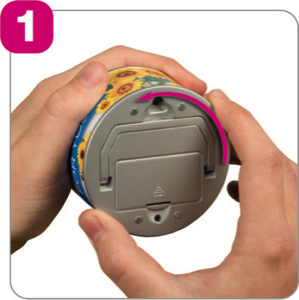
1. Twist the bottom of the clock counterclockwise.
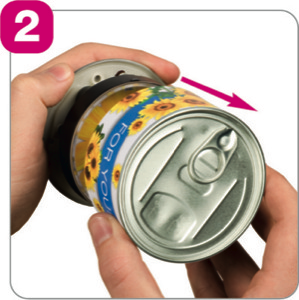
2. Pull apart the bottom and housing of the clock.
3. Take off the glass cover.
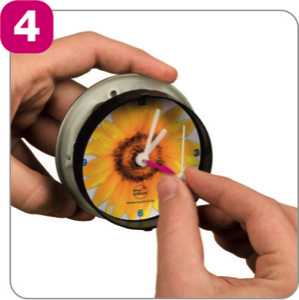
4. Carefully remove the clock’s individual hands from the central point, taking care to keep the hands (second hand, minute hand, hour hand) in the correct order.
5. Remove the paper clock face.
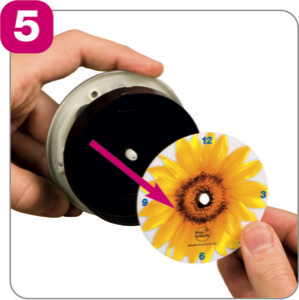
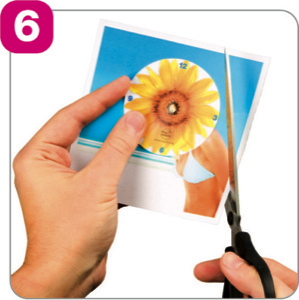
6. Cut your own photo to size using the paper clock face as a template, making sure to also punch a small hole in the correct place in the center.
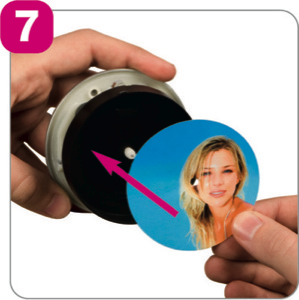
7. Place your photo onto the clock face. Please note that the small hole on the edge indicates the 12 o’clock position.
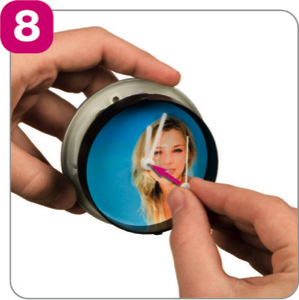
8. Replace the clock hands in reverse order, carefully pushing each into place.
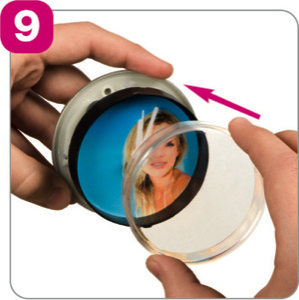
9. Replace the glass.
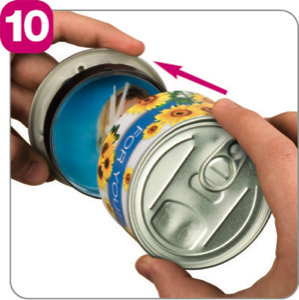
10. Slide the bottom of the clock back into the housing.
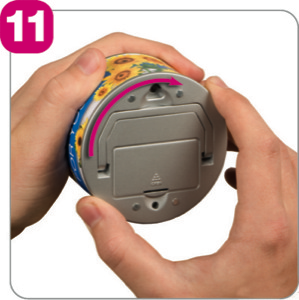
11. Twist the bottom clockwise taking care that it correctly latches back into place.
2. Pull apart the bottom and housing of the clock.
3. Take off the glass cover.
4. Carefully remove the clock’s individual hands from the central point, taking care to keep the hands (second hand, minute hand, hour hand) in the correct order.
5. Remove the paper clock face.
6. Cut your own photo to size using the paper clock face as a template, making sure to also punch a small hole in the correct place in the center.
7. Place your photo onto the clock face. Please note that the small hole on the edge indicates the 12 o’clock position.
8. Replace the clock hands in reverse order, carefully pushing each into place.
9. Replace the glass.
10. Slide the bottom of the clock back into the housing.
11. Twist the bottom clockwise taking care that it correctly latches back into place.
Some helpful hints:
Print your photo on thick paper (at least 120 gr.) so that your newly-printed clock face does not crimp or fold. When choosing a photo, think about where the central hole will be placed, taking care not to choose a photo which will result in the hole “landing” in an awkward position (such as an eye, a forehead, etc!) Don’t have a photo? Why not make an original drawing?
Interested in having your own special design on MyClock™?
MyClock™ makes a perfect souvenir for guests, colleagues or customers.
They’re perfect for family reunions, weddings and parties!
Design your own MyClock™ with a minimum purchase of only 48 units:

|
|
|
|
|
| Clock Faces PDF | Clock Faces Word | Label PDF | Label Word | Guideline PDF |